Beginnersblog

Search
Close this search box.

THE DEFINITIVE GUIDE:

A Complete Roadmap to Start and Grow a Blog in 2022 Or Beyond

start a blog by beginnersblog

If you’ve already googled the term ‘How to Start a Blog’, you probably have a basic idea of blogging.

But the problem is that no one is pointing out the RIGHT Way to do blogging. Everyone is talking about registering a domain name, buying web hosting, installing WordPress, and so on.

I know, it’s the essential part of blogging. In fact, it’s the only way to create a blog on WordPress. But it doesn’t make you a successful blogger. You need to understand the real purpose of starting a blog.

So what it is?

The ultimate PURPOSE of blogging is to ‘bring TRAFFIC & MAKE MONEY. No matter which web hosting you choose, how good your domain name is. If there is no traffic, no one cares!

That’s why I have decided to create a comprehensive guide that not only teaches you how to start a blog but also gives you the right direction you can follow from the very beginning to drive good traffic to your blog and TURN it into a profitable business very soon.

Not only that, but I will also share strategies and tools that can help you GROW your blog FASTER.

Contents

why blogging

Chapter 1

Why Blogging?

Chapter 2

Set Up Your Mindset

Chapter 3

General FAQs, Skill set, and Tools

Chapter 4

Start a Blog

Chapter 5

Write your first blogpost

Chapter 6

Traffic Growth: Right Strategy

make_money_blogging

Chapter 7

Blogging Tools

make_money_blogging

Chapter 8

Make Money Blogging

Blogging Roadmap - Step By Step Guide To Start A Blog

This infographic is an intellectual property of beginnersblog. You are not allowed to copy or screenshot this without giving credit to beginnersblog. more info please contact at info@beginnersblog.org

Start a blog

This infographic is an intellectual property of beginnersblog. You are not allowed to copy or screenshot this without giving credit to beginnersblog. More info please contact at info@beginnersblog.org

In full transparency – some of the links on this page are affiliate links, if you use them to make a purchase I will earn a little commission at no additional cost to you. It helps me create valuable content for you and also helps me keep this blog up and running. (Your support will be appreciated!)

CHAPTER 1:

WHY BLOGGING?

Before I walk you through this guide, you probably want to know why starting a blog is a great choice in 2022…RIGHT?

Well…. in this chapter, I’m going to give you 12 reasons why you want to start a blog.

So let’s have a look…

why blogging

Start A Blog: Action Map

Step - 1: Niche Selection

Choose a niche based on your knowledge, interest, and profitability.
Ex: if you’ve some knowledge about dieting, and love reading about nutrients and diets every day with great interest, then you’re welcome to start a blog profitable blog on dieting.

Step - 02: Domain Name

You can get a free domain for 1 year directly from hostings like Bluehost, HostGator & More. Or you can buy a separate domain from GoDaddy or NameCheap. it’s your choice.

Step - 03: Hosting

Get your hosting from Bluehost Or HostGator. I’ve been using these services since 2017 and they are the most affordable services you can ever find.

Step - 04: Theme & Plugins

After buying the domain & Hosting, you need to install WordPress on your hosting server. Once you’re done with this, you can then install a theme like Astra and a few plugins like Yoast SEO, Site kit, Jetpack, Wordfence, W3 total cache, and more as per your need.

Step - 05: How To Write Article

As a beginner, you can share your so personal life, what you do and how you decided to start a blog. You can follow other bloggers in your niche and see what content draws people’s attention. Read this definitive guide to learn how to write a compelling blog post.

Step - 06: Traffic

Initially, you can’t expect to get traffic from Google. So you need to rely on other traffic sources like Pinterest, Instagram, or YouTube. Once you start getting some traffic, you can learn SEO to drive traffic from Google. Learn How to drive your first 10,000 Visits from Pinterest

CHAPTER 2:

Blogging Mindset

Before setting up a blog, it’s important to set up your MINDSET.

SEE HOW YOU CAN DO IT…

Define Your Purpose –

PURPOSE” is something that motivates you to do more or achieve better in your life. PURPOSE gives you a clear vision, it’s the exact “WHY” you need to know before you begin.

For example, the purpose of learning a new skill could be earning extra money, helping others, or maybe making your life easier.

Similarly, the purpose of going to a GYM may be to earn money as a GYM trainer, to strengthen your body, or to lose weight.

So What Could Be The Purpose Of Starting A Blog…?

When I started blogging, I have no purpose. I didn’t even know whether or not I could survive.

And due to a lack of clarity, vision, and thrive, I did not take blogging seriously. As a result, lack of focus, no plans, no goals, and no achievements.

But one day, I asked myself a question… Why did I start blogging?

And my answer was simple… ‘I hate JOB, and I have no choice other than starting a blog.’ And since then blogging became the first priority of my life and this made me more focused and productive. 

In the same way, you can decide your purpose to get a clear-cut vision towards your goals.

Now you know why PURPOSE is so important in your life.

Next, you need to prepare yourself.

SEE HOW…

Prepare Yourself -

To me, blogging is more than writing BLOG POSTS. In fact, it’s a real business where you learn how to build readership, invest time & money, collaborate with brands & like-minded people, write informative & compelling articles, build a community, and content monetization.

Of course, you don’t need all these skills to start your blogging venture. Just a little habit of writing is enough to get started. And believe me, if you can write 3-4 hours consistently, you’re good to go.

So you need to prepare yourself before you go buy tools and services to set up your blog.

For your convenience, I’m going to share a simple checklist that you can follow to prepare yourself.

Blogging Mindset Check List -

If you are about to start a blog, you need to have a mindset of Blogging. What do I mean by this?

As you already know that blogging is more than writing articles, so you need to develop the following qualities to have a blogging mindset.

  1. Investing – learn to invest time & money. You can’t be successful in blogging or in any business with a mindset of scarcity.
  2. Think like a startup – Blogging is not for fun, it’s a real startup/business and you need to think like an entrepreneur to become successful in blogging. 
  3. Be Patience & Discipline – Blogging takes time. So have some patience and don’t expect immediate results.
  4. Don’t Compare – Don’t compare yourself with others.
  5. Be Consistent – Consistency plays a huge role in blogging.
  6. Don’t be emotional.
  7. Be genuine.
  8. Find The Interest Area of Writing – Decide whether you like educational, story, opinion/review, or controversial writing.
  9. Develop the Habit of Reading – You need to read the type of content you want to write. For example, you can read story-type content on Medium.com to start your own blog that covers your personal stories, success stories, and more. It helps you build the kind of character you need to develop for the type of content to produce.
  10. Sit Tight – You need to develop the habit of sitting in front of the laptop for at least 3-4 hours every day. (This is my personal opinion)
  11. Write 700 – 1000 words every day – Challenge yourself to write at least 700 words every day. This can help you to develop a writing habit. (This is based on my experience)
  12. BE adaptive – Blogging has been evolving since its inception so you need to keep upgrading your skills to keep pace with the new changes.
  13. Motivation – Follow top industry leaders and bloggers to develop a virtual foundation of blogging to drive the right kind of thought process in your mind. You can even go to YouTube and watch top bloggers’ interviews, listen to their failure stories, seminars to have that feeling in your mind.

CHAPTER 3:

Blogging FAQs, Skill Set & Tools

Well, I’ve given you a complete ‘before blogging roadmap’ to help you prepare for blogging. And I know you might have a few questions swirling around in your mind before start blogging. That’s why I have answered some of these questions in this chapter.

Furthermore, I will share with you the blogging tools and services that you need to know from the very beginning.

General Blogging FAQs

To be honest, one can spend hundreds of thousands of dollars in blogging but you don’t need to invest much in the beginning.

Generally, you need a domain name that cost you less than $20/year and hosting that cost you round $10 – $15/month.

That means, if you can manage up to $17 every month, you are in a better position to start a blog.

And later you need to invest more money to scale your blogging business. 

There is no one-size-fits-all answer to this question. But it usually takes 6 -12 months to see some inconsistent money flow.

However, it took me 3 years to make my first dollar online. But it doesn’t mean that you have to wait for 3 years to make money from your blog.

It’s all about your monetization, content marketing and promotional strategies that you use to monetize your blog.

YES, you can definitely start a blog for free.

Blogger.com, Wix.com, Medium.com, and WordPress.com are a few free blogging platforms you can use to start a free blog.

You don’t need to buy domain and hosting. Just go to one of these free blogging platform sites I’ve mentioned above, set up your account, choose your free domain name, choose a free template and start publishing your content.

That’s it!

Starting a blog doesn’t require any professional skill. But it does require a blogging mindset, patient, persistence and a little bit of writing skill.

Later you need to develop more skills to become professional blogger.

A few are…

  1. Content formatting, Writing, and editing skills (if you don’t hire a writer)
  2. Proofreading skills
  3. Marketing skills
  4. Collaboration & Networking
  5. SEO (link building and guest posting)
  • No professional skill is required – a 10th standard school guy can start a blog.
  • It enables you to live a boss free life.
  • It helps you to achieve Financial freedom
  • Huge earning potential ($100 – $100K per month)
  • You can work from home.
  • It’s quite easy to turn your blog into an online business.
  • A successful blog can help you bring more customers to your offline business.

Basic Blogging Tools & Services to Set Up a Blog

1. Hosting Server (Free & Paid)

Hosting is a virtual space that stores web pages, media files (videos and images), and the database of a blog/website.

There are free hosting services like blogger.com, worddress.com, and tumblr.com that allow you to host your content for free but these companies themselves have full control over the servers and can suspend your hosting account anytime they suspect anything wrong.

Or you can buy a hosting server from Bluehost or HostGator for $5 – $20/month to have more control over your server space.

2. Domain Name (Paid)

Simply put, a domain name is the web address of a website. It is a virtual unique identity for which every blog or website is known.

You can buy a domain name of your choice from GODADDY or NAMECHEAP for a small cost of $10 – $20 per year.

3. CMS (Content Management System) Platforms – (Free)

Even if you have a domain and hosting, you still need a CMS (Content Management System) to manage your content.

Without a CMS, you need to learn PHP, JavaScript, HTML, and CSS to display your content online. But CMS makes it easy to manage and display your content.

Hopefully, there are more than enough CMS platforms that allow you to manage your web content for free.

A few of the most popular CMS platforms are: –

Helpful Resource:  10 Best Platforms to Start a Blog

WordPress is the best choice to start a blog. And fortunately, the next chapter is going to teach you how to create a blog/website on WordPress.

So Stay tuned!

Recommended Hosting Services

When it comes to starting a blog, choosing a hosting server can be a daunting process for novice bloggers. To make it easy, I have listed 2 affordable services.
If you are looking for the most affordable hosting services then go with HostGator or Bluehost.

Bonus: If you bought one of these hostings from here, just send your billing invoice and I’ll install WordPress on your server for free.

BlueHost

Reliable & affordable
$ 2
95
/Month
  • Easy-To-Use
  • Clean c-Panel
  • 99% Uptime
  • Free Cloud-flare integration
  • Free SSL certificate
  • 24/7 Support
  • Free Site Builder
  • Free domain-specific email addresses
  • 30 days money back guarantee
Recommended

HostGator

Reliable & affordable
$ 2
75
/Month
  • Easy-To-Use
  • Clean c-Panel
  • Free SSL certificate
  • 24/7 Live Chat Support
  • Unlimited Storage
  • Unmetered Bandwidth
  • Stable Uptime ~ 99.95%
  • 45 days money back guarantee
Recommended

CHAPTER 4:

How to Start a Blog On WordPress

So far, I have discussed the non-technical side of BLOGGING which has nothing to do with creating a blog but is an essential part of your blogging venture.

Now let’s dive into the actual process of building a professional blog on WordPress…It’s the technical side of BLOGGING, where I’m going to cover a step-by-step process to start a blog on WordPress.

It’s going to be an easy process that anyone can follow to create a fully-functional blog within minutes.

So are you ready? Let’s begin…

1st Step – Find a profitable niche

This is something that new bloggers often overlook. They start a blog based on their interest & passion. And give up on their blogging journey when they realize they can’t monetize their blog just because they’ve chosen the wrong niche.

It doesn’t mean that you choose highly aggressive niche in which you know nothing. You need to find your sweet spots. 

So how you can find a profitable niche that can generate traffic to your blog and eventually turn into a successful online business.

SEE HOW YOU CAN DO IT…

#1. First thing first – make a list of highly profitable niche ideas such as Health & fitness, business, cooking, parenting, blogging, gardening and so on. (Note: These niche ideas are too broad so you’re not supposed to start a blog on any of these topics.)

#2. From the list, choose one that suits your expertise level and also can be monetized easily. (Let’s say you choose WEIGHT LOSS. It’s a highly competitive niche and I don’t recommend you go with this without any prior knowledge & experience. I’ve taken it as an example here.)

#3. Next, perform a few searches on Google & Bing to know what kind of content is being produced on this topic. With this, you get to know whether or not you can generate that level of content based on your expertise.

#4. You can even use Google Trends to see if this topic had any interest so far.

Google trend report

The above graph shows enough data that can help you figure out the popularity and trend of this topic.

#5. Next, narrow down your niche to LOWER the competition.

For this, just search this TOPIC on Google and scroll down and take a look at some less competitive niche ideas for your blog.

How to find a low competitive profitable niche

You can even take advantage of Google Auto-Complete Feature to see what is popular and less competitive.

how to find a niche to start a blog

Once you’ve something in your mind, you can then head to Google Ads> Keyword Planner and do a keyword research to see how many people potentially looking for your niche every month.

#6. Lastly, you need to look for the content monetization opportunities to see how profitable your niche is.

NOTE: Display ads, affiliate marketing, and sponsorship are common monetization methods you can leverage to make money from your blog.

2nd Step – Name your Blog/Business

Your Blog/Business/Brand name matters a lot. Not only does it make your blog/business memorable but also helps others know what your BLOG is all about.

For example, if you name your blog/business like this: “XYZabc@123.com”, it doesn’t make any sense. And people forget about it immediately.

But if you name it like this: “WeightLossIdeas.com”, it makes sense and anyone can understand the context. 

So whenever you pick a domain name for your blog/business, always keep these things in your mind…

  • Keep it simple, pronounceable, and memorable
  • Keep it small
  • Pick something meaningful that has some context
  • Don’t include numbers, hyphens, and special characters in your domain name.
  • Choose domain extensions (Top-Level-Domain, for example .com, .net, .org, .in etc…) wisely. If your blog is associated with a local business then use LOCATION-based TLD like “.in (stands for India), .uk (stands for the United Kingdom), and .au (stands for Australia)”, otherwise, go with the .com extension.

Helpful resource: 10 Best Blog/Business/Website Name Generator Tools to Find Better Ideas

3rd Step – Buy a Domain

NOTE: (Skip to next step to get a FREE domain name)

Once you decide your niche, it’s time to buy a domain name.

HERE are 2 simple ways you can buy a domain name…

1st Get a free domain name from hosting companies – most popular hosting companies like HostGator, BlueHost, and SiteGround giveaway a free domain on newly purchased hosting.

For example, if I were to choose HostGator hosting and ready to buy 1-year hosting plan, then I need to go to HostGator.com > Baby Plan (Recommended choice), and buy a 12-month hosting plan to get a free domain name registered for 1-year. (Scroll down to learn how to buy a hosting & get a FREE domain)

2nd – Buy from Godaddy or NameCheapYou can buy a separate domain name from Domain Registrar Companies. It costs you around $10 – $15 for the first year and then $20/year for upcoming years.

Now let me teach you how to buy a domain name from Godaddy…

First, create an account on Godaddy

Next, check whether or not the domain name is available.  And for that, type in your domain (let’s say) “WeightLossIdeas.com” and hit ‘search domain’ button.

Within a few seconds, it shows you the domain availability report and also gives you a few similar domain names suggestions that you can use as your BLOG name.

Domain name ideas from godaddy

From the screenshot, it is confirmed that the domain name that I’ve entered was already taken.

But if I scroll down, I can find “Weightlossaim.com” which is very similar to the previous one.

So this is how you can find a domain name.

Now, add it to cart…

Godaddy domain name add to cart

 Next, click “Continue to cart” button. And it takes you to the Domain Configuration page. Here they offer a few add-ons such as “Domain Privacy Protection“, “Custom Email Address” and starting a website for free.

To be honest, you don’t need these add-ons in the beginning, so uncheck these setting as shown in the screenshot below.

How to buy a domain from godaddy

Once it’s done, you need to click the “continue to cart” button from the right-hand side and proceed to the checkout page.

Godaddy domain checkout page

NOTE: Before completing the checkout process, make sure you switch to 1-year registration plan instead of default 2-year plan.

You can even look for promotional code to save extra money.  For this, Install Honey chrome extension to your laptop.

Once it’s activated, it’ll automatically find best coupon deals for you.

Finally, click “Ready to pay” button, add your payment method and complete the registration process.

That’s it… you have successfully registered a domain name from Godaddy.

You can follow the same trails to register a domain name from any DNS provider including Namecheap.com

Helpful Resources: How to Buy A Domain | Things to Know Before You Register New Domain 

4th Step – Buy a Hosting

There are many free hosted platforms that allow you to start a blog for free. But if you are serious about blogging and want to have a well-established blog then you need a self-hosting server.

Hosting servers are one of those building blocks that you cannot ignore in comparison to free platforms like wordpress.com, tumblr.com, and blogger.com.

Fortunately, there are ample hosting options but these can confuse you. In fact, I was very clueless in the beginning, and because of this, I made random choices.

But don’t worry, here are the 2 best-hosting companies that provide amazing services at an affordable price.

  1. Hostinger: It is the only hosting that is low-budget high performing, reliable Webhosting. And you can buy a 4-year plan to grab a minimum deal of $1.99/month only.
  2. HostGator: I’ve been using HostGator for 4 years and I’m convinced that this is the cheapest hosting anyone can afford. (You can even check this detailed review about HostGator to make informed choices.)
  3. BlueHost: If I were to make a second choice, then I’ll definitely go with Bluehost. In fact, it’s one of those recommended hosting services you can use to create your blog on WordPress.

Here I’m taking HostGator as an example…

So to get started with HostGator, first go to HostGator.com.

HostGator hosting

As a beginner, choose shared hosting because it is cheaper than VPS or dedicated hosting plans.

Next, choose one plan out of these three – Hatchling, Baby and Business Plan.

You can go with the HATCHLING plan because it is affordable and beginner-friendly. You can even choose a BABY plan if you want to work with more than one BLOG in the future.

Hostgator hosting plans

Now, click the Sign-Up button as per the plan you have chosen before.

It takes you to the signup page which is divided into 6 steps…

1st – Choose a Domain

Enter the domain name that you purchased earlier. Or you can choose one directly from HostGator.

Hostgator Hosting checkout page -1

2nd – Choose a hosting plan

Choose your hosting package. Let’s say you choose the HATCHLING plan. And then choose the Billing cycle (make sure you choose at least a 12-month billing cycle to have a domain for free)

Hostgator Hosting checkout page -2

3rd – Create your HostGator Account

Enter your email address, choose a password, and set a 4-digit security PIN

Hostgator Hosting checkout page -3

4th – Enter your Billing Info

Here you need to add your personal details and Payment details.

Hostgator Hosting checkout page -4

5th – Add Additional Services

Hostgator offers some add-ons and plugins that can help you make your blog more professional, secured, and SEO optimized.

But you don’t need any of these services at the beginning except Security.

Hostgator Hosting checkout page -5


6th – Enter a Coupon Code

As you enable Honey Chrome Extension on your chrome browser, it will start showing you some valid coupons or promotional codes that you can apply to get maximum savings.

Hostgator Hosting checkout page -6

Finally, “review order details” to make sure that everything is fine and agrees with HostGator’s Term of service & cancellation policy.

Lastly, go and click the ‘Checkout Now button.

Once it’s done, you’ll receive a Welcome email from HostGator with c-Panel (Control Panel) log-in credentials. (Keep it safe!)

That’s it…

Congratulations… you have successfully bought Hosting for your new blog.

5th Step – Connect Domain Name with Hosting

Before you configure your site, it’s important to know How to Point a Domain Name to Another Web Host?

NOTE: If you register a domain from the hosting itself, then you don’t need to connect domain name with hosting because it is already been associated with hosting server.

But if you buy domain from domain Registrar Company like GODADDY OR NAMECHEAP and hosting from hosting companies like HostGator, then you need to associate your domain name with hosting.

SEE HOW YOU CAN DO THIS…

Follow these simple steps –

First, get your nameservers – you can find them in HostGator welcome email

Email send by Hostgator company

Next, login to your Godaddy account > My Products

How to change the domain name servers in GODADDY

Then, choose your domain name that you want to point. (Type your domain name and search)

Scroll down to the “nameservers” section and click the change button next to it.

How to change the domain name servers in GODADDY 2

Now choose “I’ll use my own name servers” option and add your name servers. Then click save changes.

It takes up to 48 hours to successfully point your domain to your hosting.

That’s it…

6th Step – Install WordPress

Now that you have associated the domain name with the hosting server, you are ready to install WordPress on your server.

There are two ways to install WordPress on a hosting server. One way is quick install and the other is ‘manual method’.

And I love the quick install method. So, let’s try Quick Install Method…

First, login to your Control Panel (Use credentials from HostGator welcome email)

How to install WordPress to HostGator

Once you’re in, head to Software > Quick Install. Scroll down and click ‘Get WordPress’

Get WordPress

And then click ‘Install WordPress’

Install WordPress to HostGator server

Fill in the blanks and hit ‘Install WordPress’

How to install WordPress to HostGator 1


Within a second, WordPress sends you the login credentials via email to access your WordPress Dashboard.

That’s it…

7th Step – Set Up Your WordPress BLOG

Now that you have successfully installed WordPress on your hosting server, it’s time to set it up.

And for that, I’m going to share with you a simple checklist you need to follow just after installing WordPress…

FIRST: General

First of all, Go to Settings > General and take a look at your basic site details. From here, you can change your site name or tagline and contact emails.

Moreover, you can also choose Time zone, date & time format, site language, and user role.

WordPress website general settings

SECOND: Writing

Next, go to Settings > writing

Keep everything as it is… except “Update Services

Here you just need to add ping services to help WordPress automatically notify the following site update services.

http://rpc.pingomatic.com

http://rpc.twingly.com

http://www.blogdigger.com/RPC2

http://ping.blo.gs/

http://ping.feedburner.com

http://rpc.weblogs.com/RPC2

http://www.pingmyblog.com

TIP: You can also use https://feedshark.brainbliss.com/ to ping over 60 services for free.

WordPress writing settings

 THIRD: Reading

Go to Settings > Reading and choose your homepage display settings to make the navigation easier for readers.

WordPress reading setting

NOTE: Please don’t change the “Search engine visibility” option.

FORTH: Discussion

Go to Settings > Discussion

Here you can manage your comment settings. You can enable/disable comments on posts, control comment author details, break comments into pages, CHANGE avatar display, and more.

For now, I suggest you keep all settings as it is.

WordPress discussion settings

 FIFTH: Media

Go to Settings > Media

It allows you to manage your media size. (Keep the settings as it is…)

WordPress media settings


SIXTH: Permalinks

Go to Settings > Permalinks

From here you can change your post URL structure.

But make sure you use this setting discreetly. And more importantly, don’t make any changes to the permalink settings once you start publishing the content.

I use the ‘Post Name’ URL structure in all my posts, you can choose the same option as shown below…

WordPress permalink settings

WordPress permalink settings 1

WARNING: Changing your permalink settings frequently can seriously affect your search rankings & visibility.

Install a Theme

OKAY, the basic setup is done…

Now let’s come to the designing part which is “installing a theme”.

A few things that you need to remember before choosing a theme…

  1. Choose a simple & lightweight theme.
  2. Go with Freemium themes instead of free themes.
  3. Choose a theme that suits your niche
  4. SEO optimized
  5. Easy navigation
  6. Compatible with WordPress add-ons and plugins

You can find such themes from the WordPress theme library.

To get started… just head to Appearance > Themes > Add themes

Apply filters to get targeted results.

WordPress theme filters

Type in your niche; for example, HEALTH, and hit enter. Within a few seconds, WordPress shows you a couple of themes you can choose from.

Pick one theme that fits your criteria and install it.

Once it’s done, activate your theme and start customizing it from Appearance > customize

Basic theme customization option in WordPress

From here you can upload your site logo, change theme layout, typography, and theme color, add widgets, and can also add custom CSS code.

Helpful Resources:

Install A Few Plugins

Plugins are little add-ons that add extra functionality to your blog or website. You can use these plugins to add additional features to enhance your site functionality.

With that said, I’m going to compile a list of essential plugins that you need to install right away.

  1. YOAST SEO PLUGIN – This is the must-have SEO plugin every WordPress blogger should install. It helps you boost the on-Page SEO of your BLOG.
  2. WPFORMS –It enables readers to contact you quickly. You can install WPforms or Contact form 7 to make it even easier.
  3. UPDRAFTPLUS BACKUP PLUGIN Updratplus is a freemium plugin that enables you to take backups manually for free. Or you can upgrade to the premium version to have the auto-backups feature enabled.
  4. WP SMASH – With this, you can compress your media files to save server space.
  5. SECURITY PLUGIN – There are plenty of security plugins that provide endpoint protection to your BLOG or website. For example, Wordfence, sucuri, or SiteLock. You can install one of these plugins to secure your WordPress site.
  6. CACHE PLUGIN Usually your site takes time to load but caching reduces the loading time and makes it faster than usual. A few of the most popular cache plugins are W3 total cache, WP rocket, and WP super cache
  7. JETPACK BY WORDPRESS – It’s an ultimate plugin for WordPress. It comes with tools to help you track your traffic report, improve social media sharing and prevent spam attacks.
  8. Google Site Kit: It’s the official plugin from google that enable WordPress users to deploy and manage Google tools (AdSense, Google Analytics, search console, and more) from the WordPress dashboard.


CREATE PAGES


ABOUT ME / ABOUT US 

The primary reason for having an about us/about me page is to introduce you, your business, and your services to your audience. It’s a great way to build a personal relationship with readers.

So it’s important to have an about me/us page to entice people to become your loyal reader or customer.

You can optimize your ABOUT ME/ ABOUT US page better by including the following information.

  • Acknowledge the problems your readers encounter and tell them how you can solve those problems.
  • Add some testimonials to build trust in your brand.
  • Tell your story about how you established this business/blog.
  • Add media files to make it visually appealing.
  • Include name, address, and contact details.

 PRIVACY POLICY –

The privacy policy is a legal statement every online business website must include. It explains how and for what purpose a company, organization, or individual handles a user’s personal data.

This is to keep you away from any legal dispute.

What’s in there…?

  1. Add your business name
  2. Add your Contact details
  3. Tell me what kinds of user data you collect & store
  4. User consent statement
  5. Why do you collect personal data?
  6. How do you use this data?
  7. How can a person lodge a complaint against the company if he suspects that his information has been mishandled?


DISCLAIMER –

A disclaimer is any kind of legal statement that protects you from claims against your obligations. And most importantly, it is used to specify or limit the scope of liabilities for the products or services you provide.

It is mandatory for any company to inform consumers about the consequences and drawbacks of its products and services.

Whether you are a blogger or an online business owner, you must add a short disclaimer to your Business or Blog.

There are different types of disclaimers.  For a blog or online business, you can use the “no responsibility disclaimer” which includes the liabilities of your product or services.

So now you’ve done with the basic part of BLOGGING, now let’s move on to the NEXT part which is even more important.

CHAPTER 5:

Write Your First Blog Post

Are you excited to see how to publish your first BLOGPOST that can give the most of the value to your very first readers?

 Let’s get started…

start a blog by beginnersblog

1st STEP – TOPIC RESEARCH

I want you to focus on topics that can help other creators’ audiences. In this way, you can attract their audience toward your BLOG.

For example, let’s say you start a blog about “WEIGHT LOSS”.

First look for industry leaders in your niche, check their social profiles (Twitter, Instagram & Facebook), BLOG content, and see what type of content generates the most engagement.

For simplicity, you can use BuzzSumo to find influencers and research the most popular content on the internet.

On top of all, it’s really important to figure out people’s pain points, so that you can come up with better content ideas.

With this in mind, enlist some of the best ideas and make a layout of your blog post.

2nd STEP – KEYWORD RESEARCH

Simply put, Keyword research is a process to find out what your targeted audience is searching for and how you can optimize your blog post to rank well on the search engines to drive insane traffic.

You can have some keyword research tools such as Google Keyword Planner, KWfinder or SEMrush to get started.

Just head over to one of these tools and enter your seed keyword (let’s say ‘KETO DIET’). Within a few seconds, you can have a huge list of popular keywords that you can incorporate into your content.

Choose the best keyword ideas based on search volume, competition, and difficulty score.

As a beginner, go with keywords that are less competitive and have low search volume. In this way, you can increase the chances of ranking.

If you are still confused with keyword research? I’ve published an article about Keyword research to learn the entire process.

3rd STEP – START WRITING

Now it’s time to write a compelling BLOGPOST.

So how do you do it?

Once you have that layout and focus keyword in your mind, go to WordPress > Posts and click ‘ADD NEW’

 How to write first blog post on WordPress

It redirects you to a Gutenberg post editor page, where you can put a nice ‘TITLE, and start writing your blog post.

WordPress post editor

While writing, make sure you add your focus keyword in TITLE, first paragraph, subheadings, Meta description, and URL if possible.

I don’t want you to add the same keyword over and over again, use synonyms & LSI keywords instead.

Once you are done with writing, edit your permalink to make it short and meaningful and upload media files.

And also don’t forget to check for the YOAST SEO recommendations to enhance your on-page SEO. 

NOTE: If you are not okay with the Gutenberg editor, then you can install the Classic Editor’ Plugin to enable the classic WordPress editor which is quite easier than Gutenberg.

A handful of articles that can help you with writing your first blog post on WordPress

 4th STEP – Final STEP

The final thing is proofreading. YES! Before you hit publish button makes sure you proofread it.

I am not saying that you need to be perfect from the beginning. But the point is that neither are you a professional writer nor capable of hiring anyone, you need to proofread your content on your own to enhance your readability score and make it easy for your readers to understand.

And for this, you can have these free online proofreading tools to help you with your writing –

  • Grammarly
  • Ginger
  • ProWritingAid
  • GrammarCheck

Helpful Resource: Best Online Proofreading Tools

You’ve successfully set up your WordPress blog. Now let’s talk about how you can actually grow your BLOG

CHAPTER 6:

Traffic Growth: The Right Way

In this chapter, I’m going to reveal the RIGHT WAY TO GROW YOUR blog that people often overlook.

Learn – 

  1. Traffic growth, types of traffic
  2. The right way to grow your blog
  3. The exact strategy to grow your blog

Obviously, it has nothing to do with Creating a BLOG. But it’s the end purpose of starting a blog.

So, let’s understand the fundamentals of traffic GROWTH…

 TRAFFIC GROWTH

You know the end goal of starting a blog is to drive targeted traffic and make money online.

So how could you achieve it…?

To be honest, my blog doesn’t get much traffic, so I can’t teach you how to drive over 100K visitors a month and I don’t want to make fake promises either.

But I can set you up for 10K visitors a month which is quite enough for a new blogger.

So are you ready to learn how to approach blogging in the right way? How can you achieve astonishing results from the beginning?

Let’s get started…

In general, there are 3 types of traffic

  • Organic traffic
  • Paid Traffic
  • Social media Traffic

Let’s talk about each one of them individually.  

1. ORGANIC TRAFFIC

This is the most valuable yet free targeted traffic that usually comes from search engines like Google, Bing, Yahoo, and others.

Unfortunately, it’s really exhausting to get enough traffic from search engines. In fact, my organic traffic never exceeded 7,000/month. This was the highest number ever.

And the reason for this, I never focused on link building and other hard-core SEO traffic strategies.

But it doesn’t mean that you can’t drive ORGANIC TRAFFIC to your blog.  With the right content, keyword research, link-building, and SEO strategies, you can definitely drive insane traffic.

So what do you need to focus on in order to drive organic traffic to your BLOG?

The number one thing is ‘CONTENT’

Yes! You need to produce highly valuable, long-form SEO-optimized content.

If you’re still confused about how to write SEO-optimized content, then I highly recommend you read this post – https://beginnersblog.org/how-to-write-a-blog-post/

The second thing is ‘KEYWORD RESEARCH’

For better keyword research TRY SEMrush for free here. You can even read the post I’ve mentioned above. (Scroll Up)

And the third thing is ‘LINK BUILDING’

Don’t ignore link building. It’s the essential part of your SEO that can literally change the course of your BLOGGING venture.

But building high-quality backlinks is an arduous process. It’s quite overwhelming initially. So, I won’t suggest you spend much time on LINK-BUILDING in the beginning and focus on creating content for at least 2-4 months.

Once you have enough content, people are more likely to link you back.

If you hate LINKBUILDING like I do, you can hire an expert in this field to take care of your link-building.

Helpful Resource: 13 Ways to Build High-Quality Backlinks

My personal opinion

Like I said, Organic traffic is pure GOLD but at the same time an arduous process. So for beginners, it’s easy to give up.

On top of all, it takes a long time to drive sustainable traffic from search engines; especially if you’re not doing link-building.

That means, that if you don’t have enough time & Money, you’re going to give up too early in the process. So I suggest you don’t feel like a failure if you’re unable to drive ORGANIC TRAFFIC to your blog.

Still, there is a HOPE… and the right STRATEGY that I’ll discuss in a few minutes.

As you know Google and other search engines are full of information. In fact, Google prefers low-quality branded content over high-quality blog content.

Even if you write highly valuable content, Google will not rank you high unless you build high-quality backlinks and authority.

Additionally, Google auctions its top positions that allow advertisers to show their thin content on top of you.

So…. in the end… MONEY wins the game.

It means if you don’t have money then don’t expect immediate results. You have to trade your time to build immense authority and backlinks to outperform your competitors.

That’s why I hate TOP BLOGGERS and influencers who suggest a naïve BLOGGER write long-form content.

This is not done…

You know what… ever since well-established billion-dollar brands entered into blogging, BLOGGING is getting super competitive.

And NOW it’s no longer about the CONTENT and value you provide, it’s about how well you establish yourself.

2. PAID TRAFFIC

If you don’t have sufficient time, then I suggest you opt for PAID TRAFFIC. This is the type of traffic that is highly targeted and easy to drive.

However, it is an easy and effective way to make your blog successful, but you need to trade money for time.

Unfortunately, it seems impossible for a first-time blogger to invest money because of financial instability.

But if you are an intermediate BLOGGER and want immediate results, then try PAID traffic.  You can try GOOGLE, FACEBOOK, Twitter, and LinkedIn to drive PAID TRAFFIC.

3. SOCIAL MEDIA TRAFFIC

It’s somewhere in between the two types of traffic.

Though it is less specific and less targeted, you don’t need a lot of time to drive a significant amount of traffic from social media. It helps you build a robust readership to bring good traffic, which encourages you to stick longer in your blogging journey.

That’s why I consider this traffic to be the RIGHT WAY to advance your blogging journey.

It’s the answer to a question I’ve sown in your mind from the start.

So why did I choose ‘Social Media Traffic’ to be the right strategy to succeed with blogging? Let me explain this to you…

First things first, I have personally felt that increasing your social media traffic is easier than begging for backlinks and driving traffic from search engines. For example, it took me less than 8 months to get my first 50K/Mo visitors to my blog from Pinterest, whereas it never happened with Google. (Read this post)

Secondly, you don’t need to invest a lot of time and money. If you stick to one social media platform for 6 – 8 months, it’s definitely going to help you grow your BLOG. 

Consistency plays a vital role in social media success. And the beauty of social media is that it gives you the credibility to lead your audience which gets stronger over time.

It is beginner-friendly and requires no additional skills apart from generating social media traffic and building a huge following.

Social media gives you an opportunity to know your audience very well. In fact, you can talk to your audience closely. For example, you can go live once a week and answer their questions.

The social media traffic is easy and builds with time. That means you can drive traffic to your new blog right from the start. More importantly, you can use your social media traffic to monetize your blog and use that money as fuel to build backlinks and take care of SEO as well to generate organic traffic to your BLOG.

Google is concerned about Expertise, Authoritativeness, and Trustworthiness. And with money, you can easily simulate these things. For example, you can hire experts to write on your behalf, and create high-powered backlinks, and other stuff to force Google to rank you on top. On the other hand, beginners with a lack of funding cannot fake it and they have no alternative but to work hard. That’s why I chose SOCIAL MEDIA because it concerns consistency.

So in a nutshell, choosing social media as an initial source of traffic can be a wise decision and lead you to a successful blogger.

On the other hand, if you choose organic traffic, then ensure that you have enough time, money, and motivation to stay on the path. Otherwise, you’ll be out. 

So now that you can know the right strategy to grow your blog, now it’s time to learn how to apply this…

1ST – CHOOSE ONE SOCIAL MEDIA PLATFORM

By now you have learned how to set up a blog and write your first POST. Now it’s the time to focus on the main objective of starting your blog which is ‘DRIVING TRAFFIC’

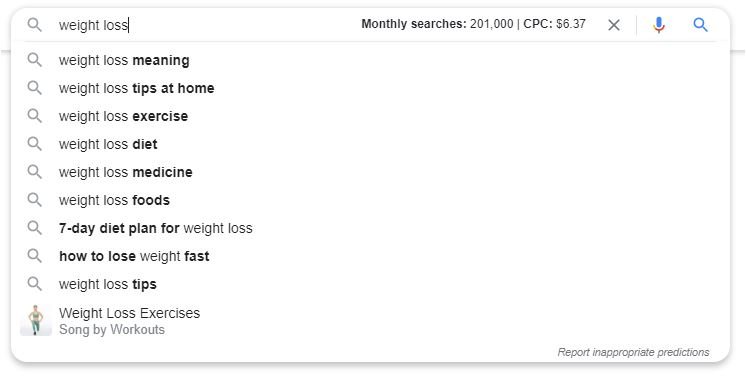
To drive traffic to your blog, you need to choose the right social media platform. And for that, you need to find out the audience which is more likely to consume the type of content you want to publish on your blog.

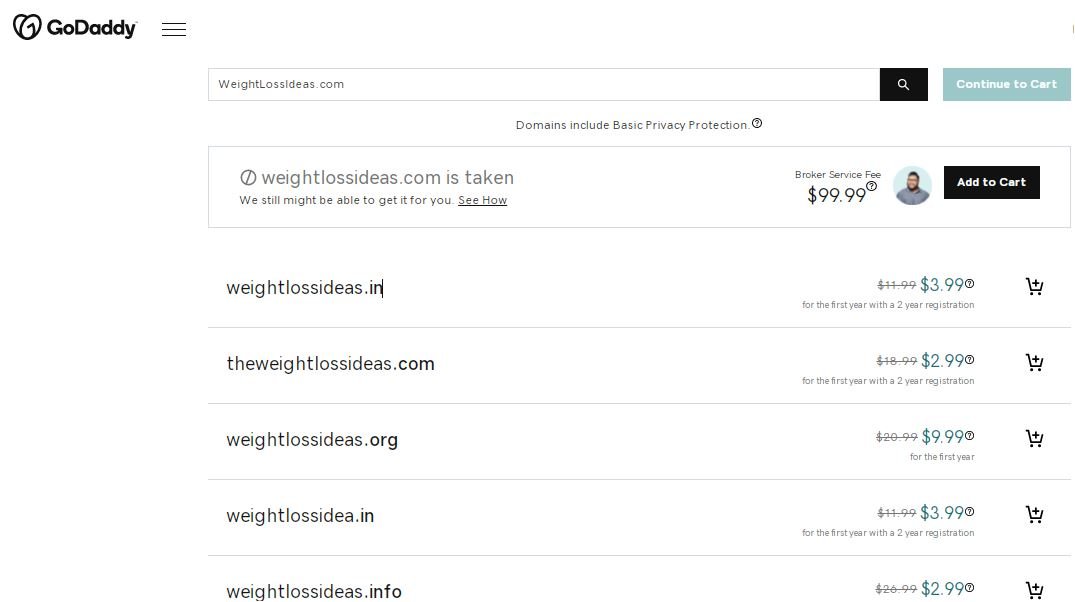
For example, if you blog about ‘WEIGHT LOSS’, then go with Instagram, YouTube, or Pinterest.

Likewise, if you choose to start a BLOG about ‘BUSINESS & MARKETING‘ then LinkedIn or Twitter, and YouTube may be the better options. 

2ND – CREATE CONTENT

Whichever platform you choose, you must produce the best of the best content.

And to do so, you need to find the most popular and engaging content on the platform to obtain the best content ideas.

You can even follow popular creators or influencers to find more ideas and begin producing content based on their ideas.

3rd – GROW YOUR ACCOUNT

CONSISTENCY is one of the best social media growth strategies that people often overlook.

They produce content for a month or two and if nothing happens they move elsewhere and continue repeating the same mistake over and over again.

Remember, if you stick to one social media platform, you might get a chance to find one of your videos that goes viral quickly. (ex: Instagram, Facebook, YouTube, or Pinterest).

So keep on producing the best content and build enough following on one social media channel first.

But how can you build enough following?

For instance, if you want to grow Instagram… Here is how you can do this…

  • First SET UP your profile
  • Optimize your BIO
  • Create engaging highlights
  • Find the best content ideas in your niche and add more value to it
  • Post 2-3 times a day; add value to people’s time
  • Go live once a week
  • Make engaging stories, reels, and IGTV to increase the potential reach
  • Build a strong relationship with your audience
  • Use hashtags for additional reach
  • Publish carousels post once a week.
  • Be consistent

Helpful Resource – How to gain your first 6,000 organic followers on Instagram.

4th – DRIVE TRAFFIC

Once you have enough content and 1000 followers, you can start using strong CALL-TO-ACTIONS to drive people to your blog.

It’s not so easy in the beginning, but as your account grows, it adds credibility to your CALL-TO-ACTION (CTA). Consequently, people are likely to visit your blog, product, or service page and soon they begin to consider you as an expert in a particular niche. And hence, you can bring huge traffic to your blog.

If you happen to decide PINTEREST as the primary source of traffic, then Go check out this step-by-step guide to learn how to drive your first 10,000 visitors to your blog from PINTEREST.

Finally, you have learned how to approach BLOGGING in the right way, set up your blog on WordPress, and drive your first 10,000 visitors to your blog.

And if you follow this exact blueprint I’ve shown you above, you never have to quit your blog just because GOOGLE isn’t ranking you.

CHAPTER 7:

Blogging Tools

I’ve been using these tools for years to supplement my Blogging Growth. 

Let’s drive in…

1. Canva

It doesn’t matter whether you are a BLOGGER or social media influencer, CANVA fulfills all your graphic design and content creation needs.

I’ve been using this tool for 4 years now and it helped me with Social media graphic designing, Blog post featured images, Pinterest Pins, and editing short videos.

And the best part, the free plan is more than enough to leverage the power of this tool.

But if you go with CNAVA pro, you’ll get access to millions of premium stock images & videos, illustrations, elements, infographics, charts, and templates to give you countless choices to come up with exceptional design ideas.

Additionally, CANAVA Pro comes with some advanced features to help you remove background from any image, resize your designed template, and more.

In fact, I created a beautiful eBook with Canva PRO.

2. Elementor – Powerful WordPress Page Builder

Elementor is a Drag & Drop Page Builder. With this, you can design a fully-functional website without any coding skills.

In fact, every single element of my blog is designed with elementor. It gives me so much flexibility to come up with new design ideas.

You can design your homepage, single post page, header/footer, archive page, and ABOUT ME page.

In addition to this, you can create popups, signup forms, and add raw HTML code to give your blog a fresh look.

For more, you can check out my review here.


3. Buffer – Social Media Content Scheduler

Buffer is one of the best social media content scheduler tools you can use to share content on social media on the go. buffer is a beginner-friendly tool that can save you a lot of time.

And the best part is? You can manage up to 3 social media accounts with its free version.

Try buffer.com

4. Tailwind –Pinterest & Instagram Scheduler

Very similar to buffer, Tailwind is also a social media content scheduler tool but more focused on Pinterest & Instagram.

If Pinterest or Instagram is part of your content marketing, you can definitely try Tailwind.

5. Semrush & Ahref

Semrush and Ahref are the two popular tools bloggers and online marketers incorporate into their keyword research, content research, and competitor analysis.

Although these tools are not affordable, you can try SEMrush 7 days free trial to find profitable keyword ideas.

6. Systeme.io

When it comes to affiliate marketing & marketing sales funnels, this tool helps me a lot. With this, you can set up your marketing funnels, and run automated email campaigns with workflows.

Not just that, you can even build a list of 2,000 subscribers absolutely for free.

7. Sitelock

Please don’t confuse HTTPS with security. For your kind information, a blog with HTTPS can’t keep your server safe.

I mean, even if your blog is HTTPS enabled, you still need a third-party security service to secure your site from being hacked.

And SITELOCK is one of those security services which I have incorporated with my server to keep my BLOG fully secured.

(Sucuri & Wordfence are two alternatives to SITELOCK.)

8. Aweber

A blog with an email list of 10,000 subscribers can bring additional 500 – 1K visitors every single month. It’s your forever audience you can nurture over time to build a deeper relationship with the audience.

So you need to build an email list in order to drive additional traffic. And for this, you need Aweber; an email marketing tool that can help you build an email list.

With this, you can create landing pages, and email forms and set up email automation to keep feeding your list.

And the best thing about Aweber is that you can add your first 500 contacts for free.

9 Renderforest

Renderforest is a Swiss Army Knife of online branding tools where you can find everything from designing a simple logo to creating a highly engaging animation video.

You can create social media graphics, mockups, animation videos, explainer videos, intro outro videos, and more in one place.

With hundreds of thousands of pre-made video templates, you can create professional animated videos in minutes and grow your social media channels like a charm.

If you want to learn more about renderforest, you can check out this review article I have published on my blog.

Keyword Research Tools

Keyword research is a great way to find search ideas to fulfill people’s demands on Google and other search engines.

And for this to happen, you need some sort of tools to conduct the keyword research process in a more intuitive manner.

With this in mind, I have listed some of my favorite tools that I often use to compile awesome keyword ideas for my blog posts.

1. Kwfinder

Kwfinder is a great alternative to Ahref or other keyword research tools you can’t afford.

The best thing about kwfinder is that it shows accurate keyword data. That means you can trust its keyword matrices more than any other tool.

2. Google Keyword Planner

I’ve been using GKP since I started blogging. Well, it’s not so effective but it’s a free tool that can help you discover keyword ideas for your blog posts, product, and services. Check GKP

 Helpful Resources (Find More!)

Blogging Courses –

Pinterest Traffic Avalanche – explode your traffic on Pinterest

If you know nothing about Pinterest but want to drive insane traffic to your blog, then you can take “Pinterest Traffic Avalanche”.

This course can be a good starting point to mastering your Pinterest game.

For more information about this course, you can contact me at info@beginnersblog.org, I’ll try my best to answer your questions.

Authority Site System Pro

This course is for those who want to learn the fundamentals of authority sites and start a profitable online business.

It can help you build your first affiliate site successfully that can make up to $10,000 Per Month.

The Authority Site System is an absolute solution for newbies or for those who never made $1000/month before.

A quick overview (What you’ve learned so far…)

  1. Why blogging is important?
  2. Blogging Mindset Checklist
  3. Blogging FAQs
  4. Blogging Tools
  5. How to start a blog – Choosing a niche, buying hosting, domain, and installing WordPress
  6. Traffic Growth: The Right Way

Now it’s time to learn how to monetize your blog to start making at least $1K/Month

CHAPTER 8:

Make Money Blogging in 2022 Or Beyond

Once you have a nice blog with valuable content & traffic, it’s time to monetize your blog content.

And luckily there are several ways you can make money by Blogging. These are basic monetization methods you incorporate into your blog monetization strategy.

REMEMBER: you have few monetization options in the beginning, but once you grow your blog, you can keep on adding more income streams over time.

make_money_blogging

1. Ads Networks – Display & contextual ads

Adsense, media.net, mediavine, and monumentric are a few ad monetization networks that you can join to start making money online.

But remember you are ineligible for some of the premium monetization networks like Media.net, mediavine, and monumentric.

You need to pass the eligibility criteria. For example, if you want to monetize your blog content with mediavine, then you have to drive at least 50,000 visitors per month to your blog.

On the flip side, AdSense doesn’t have any traffic restrictions. But you need to comply with AdSense TOS (Terms of services) and policy guidelines to get AdSense approval.

To make $1000 from AdSense, you need to drive 70K – 80K visitors a month from tier one countries like the USA, UK, Canada, Australia, and New Zealand

But if the targeted traffic is from lower-tier countries India, and Pakistan, then you need to drive 200K – 300K page views to make $1,000 from AdSense.

For a better understanding, you can refer to this guide.

Although you can’t earn much from ad networks, this is the easiest and beginner-friendly method to monetize your blog.

Bonus- Do you use AdSense or other Display advertising networks to monetize your blog? if so, I recommend you use advanced Ads to optimize your ads and boost your ad income. 

I Have been using Advanced Ads for 30 months now and all I can say is that it’s incredible. Go check it out!

Advanced Ads


2. Affiliate Marketing

In short, affiliate marketing is an advertising model where you promote other companies products and services through a special affiliate link. And whenever someone buys a product using that special link, you earn a commission.

The good thing about this monetization model is that you don’t need to create your own products, no inventory & no customer handling.

Everything is ready to use, you just need to join one of these affiliate networks, grab your unique affiliate link and share it with your audience.

Although the process looks quite convincing to you, it’s not as easy as it sounds.

In fact, it took me 3 years to make my first $149 dollar from affiliate marketing. So be patient and learn affiliate marketing skills to monetize your blog content.

3. Get Paid To Write For Others

Content Writing is a highly demanding skill in the blogging industry. With this, you can make $50 – $200 per post easily.

All you need to do is find some of the best content writing jobs, submit your writing samples, and wait for the approval.

Once you get approved, you can then submit your final post document and get paid if they agree to publish your content on their website, blog, or publications.

A few websites that can pay you up to $200 per submission…

  1. Linkable
  2. The Penny Hoarder
  3. Copy Hackers
  4. Listverse
  5. Sierra Club
  6. Money Pantry
  7. Longreads

Helpful ResourceGet Paid to Write Article: 9 Websites That Pay Up To $200 per submission

4. Offer One– On – One Blog Coaching/Mentoring

Once you have a nice audience on your blog, you are in a better position to offer one-on-one coaching to help people start Blogging.

You can charge somewhere around $300 – $2000 per client for mentorship. Although it’s quite hard to get high-paying clients in the beginning you can improve your skills to acquire these clients to boost your potential earnings.

5. Sell your eBook or Mini Course

Another way you can make money blogging is by selling your eBook or mini course.

YES! You don’t need to create a complete course, just launching an eBook or a mini course is enough to monetize your audience in the beginning.

Although, it won’t make you a fortune but can definitely help you pay your bills.  

You can create a small eBook that teaches people something in your niche.  Let’s suppose you blog about “Weight loss”, then you can create an eBook comprised of 20 pages that talk about 50 secrets to burning stubborn fat.

And you can price it from $1 to $5 and publish it on your blog and start making additional income.

PRO TIP: You can even use this eBook as a lead magnet to build your email list later.

6. Write Advertorial or Sponsored posts for companies & brands

This monetization method works well only if your blog has a highly targeted audience. If that’s the case, you are more likely to receive sponsored content requests from companies in your niche. And get paid $50 – $100 or more every time you publish advertorial content on your blog.

So, these are 6 monetization methods that can help you make money blogging.

Next, I’m going to give you some bonus tips to help you grow your blog faster…

CHAPTER: BONUS

Bonus Blogging Tips

In this bonus chapter, you’re going to find a few blogging tips to help you succeed with blogging.

Just read this thoroughly!

blogging tips

1. Don’t Try To Be Perfect In the Beginning

Successful people in history were once losers. But one of the few reasons behind their success was that they didn’t care about perfection in the beginning. This means, if you focus on being perfect from the start, you will never start & grow because of the fear of failure.

So, once you make up your mind, start taking action. Don’t think too much, see how it goes, and take necessary steps based on that.

2. Don’t Compare

I already told you that blogging takes time and if you compare yourself with someone who has been there for years, you’re not going to make any improvements and are more likely to quit early in the process.

So, enjoy your own journey and learn from other people’s failures.

3. Build Your Own Traffic Asset

No matter how much traffic your blog drives today, you own nothing unless you build your own traffic asset.

Think in this way…

You have less control over traffic.

Let’s suppose, your blog drives 200 visitors daily but all of a sudden your traffic went down to 20 visitors a day. (It could be possible because of the new algorithm update…)

You never know when you’re going to encounter these ebbs and flows in your traffic. So, you need something that you can own and control.

And building an email list can help you create your own traffic asset, so you never have to hinge on Google or social media traffic sources.

So start building your email list from day one and drive traffic on demand.

Helpful Resource: free email marketing tools that can help build you build an email list from day one

4. Leverage the Power of Social Media

As I said, social media is the right way to start a blog but you have to stick with one social media platform to make your blog grow faster than ever.

And once you have built a loyal audience on one social media platform, you can move on to other social media platforms. In this way, you can take advantage of social media platforms to establish a huge audience and drive immense traffic to your blog.

You can choose Instagram to build a highly engaged and targeted audience. Remember, Instagram may not help you drive much traffic to your blog, but can certainly help you build a strong connection with the audience.

Similarly, you can use Pinterest to drive huge traffic to your blog, but you can’t build a loyal audience.

So choose your social media based on your business need.

5. Add Infographics, Videos, and Real Case Studies to Your Post

If you add too much text to your blog posts, people will leave very quickly. And the reason is simple… people hate reading text

Human psychology is that when you see too much text, you feel bored and even if the article is informative, you won’t read it.

Another reason this happens is that your brain processes images faster than text.

This means that if you add visuals, and media files to your article, people are more likely to read your post.

This will not only improve user engagement but also boost rankings on search engines.

6. Update Existing Posts

Google loves fresh content. But it’s really hard to come up with a new article every day.

So what you can do is update your existing post.

This is a great way to increase your search traffic by 1.25x or 1.5x. I really love this. And for best results, you can go to google analytics and make a list of best-performing articles, and start updating them one by one.

If you update one post every day, it will definitely improve your search traffic on Google.

7. Use Quora, Reddit, and Buzzsumo

If you’re out of content, use Quora, Reddit, and buzz sumo to find the best content in your niche.

Quora is a huge Q&A site where people come to find answers to their questions. You can find anything from stories to business and marketing support from experts.

You can find some great questions in your category and post the answers in the form of blog posts on your site. Repeat the same process to find more blog post ideas.

Or you can also use Buzzsumo to find powerful content ideas in a few minutes.

8. Focus on Quality over Quantity

Somewhere I read that “posting more content can make you successful blogging faster than usual.”

But this is an incomplete statement, it should be so, “Posting more quality content can help you succeed”

Remember – if you produce the best content, you can’t produce more. You need to outsource it to others to produce more quality content.

But if you are unable to outsource, you need to produce less but the best content. So always focus on quality over quantity.

9. Invest Time & Money

Nothing comes free. You need to pay the price in terms of time or money.

If you have time, set aside more time for learning and execution. Develop skills, make money with these skills and produce some money.

But if you don’t have the time, invest money in doing things faster.

And if you have less time and less money, use both carefully. Do not complain, work hard and produce money, and use this money to employ people to get things done in less time. This is how you can manage to work efficiently.


10. Repurpose Your Content

The simple way to get more people to your blog is to reuse your content.

Repurposing means creating a different version of existing content.

For example, you can turn a blog post into an eBook, PDF, short video, or infographic to bring new people to your blog.

The best way to rearrange your content is to find the best and evergreen content from your blog/site and turn it into a small e-book.

With this, you can build a huge email list for free and help more people find your content.

Congratulations! You have successfully learned the right way to start a blog.

NOTE: This post includes all possible steps that you need to take to start a blog but still doesn’t talk about SEO. But if you want to learn SEO I’ve already published a definitive guide to learning SEO in detail. If you’re interested, then go check this out.

CONCLUSION

This is one of the most in-depth blog posts that helps you to start a blog. And if you read this post, I guarantee you that it will change your perspective on how you think about starting a blog.

I am not saying that this is the only guide but I have specially designed this post for beginners who have no idea about blogging and are curious to know the right way to start a blog.

So, I hope you enjoyed reading this post and will be able to start a blog on your own.

Do you have any questions? Speak your thoughts in the comment section

Shailesh Shakya
Shailesh Shakya

I'm a Professional blogger, Pinterest Influencer, and Affiliate Marketer. I've been blogging since 2017 and helping over 20,000 Readers with blogging, make money online and other similar kinds of stuff. Find me on Pinterest, LinkedIn and Twitter!

Love This Post? Share It

1 thought on “Start a Blog: A Complete Roadmap to Start and Grow a Blog in 2024 Or Beyond”

Leave a Comment

Your email address will not be published. Required fields are marked *