In February 2018, the Google AdSense team introduced a new ad serving technology. It’s called ‘AdSense Auto ads’ which uses artificial intelligence to improve the ad serving placements.
As an AdSense publisher, you always worry about Ad placements because it helps you improve user ad experience.
But Now Google AdSense auto ads take care of that. All you need to do is enable these auto ads on your site.
But before I started, I want to explain to you what is Auto ads and how they work.
So let’s get started…
It is not the primary guide to AdSense so if you don’t even know what AdSense is then you can read the following guide – What is AdSense and how does it Work? [Full Beginner’s Guide]
Once you’ve studied this guide, you’ll get to know what AdSense is and how it works.
After reading the basics, you’re now able to understand what AdSense auto ads are. So, let’s jump on…
What are Google AdSense auto ads?
Google auto ads are the ads that use artificial intelligence to find the best Ad placement opportunities automatically on your site to improve the USER ad experience and revenue as well.
It’s new, so no one knows how useful it is. But, I promise you that after analyzing auto ads sincerely, I’ll share you with my experience which can answer some of your questions. [I’ll publish a case study about auto ads as soon as possible]
Now let’s come to know how it works…
It’s not tough to understand the process of how this ad technology serves the ads to the users.
It analyses your post or page
Firstly, it examines your pages or posts after enabling ad technology on your site. It collects all information available on your page including content, context, placements, etc.
It shows random ads on your site to the user
Next, it selects some available ad placements and ad types to display on your site. It also changes the placement and type of ads continuously to learn the effect itself.
It finds the optimal ad opportunities
Finally, it collects the entire data and analyses the best ad placement and ad type on your site to serve them accordingly.
As I said, it uses MACHINE LEARNING technology to learn by itself. So, you don’t need to ask silly questions like which AdSense ad placement and ad type is best or how to optimize the AdSense ad revenue.
Over time, it will become better and better so don’t overthink. Just go ahead and see how it goes.
Now let’s see how to implement AdSense auto ads to automate ads on your site.
How To Setup Auto Ads in WordPress
I’m going to tell you the easiest way to enable ads on your entire posts or pages without headaches.
It’s for WordPress users. If you are a BlogSpot user, then don’t worry you can comment me down. I’ll shortly update this post that includes the setup process for both WordPress and BlogSpot to enable AdSense auto ads.
Without further due, let’s get started…
1st STEP: –
Log in to your AdSense dashboard.
[Also check out: – Google AdSense login issues ]
2nd STEP: –
On the left-hand side, click ‘My ads’. As you click it, you’ll see an automatically smarter ad console.

3rd STEP: –
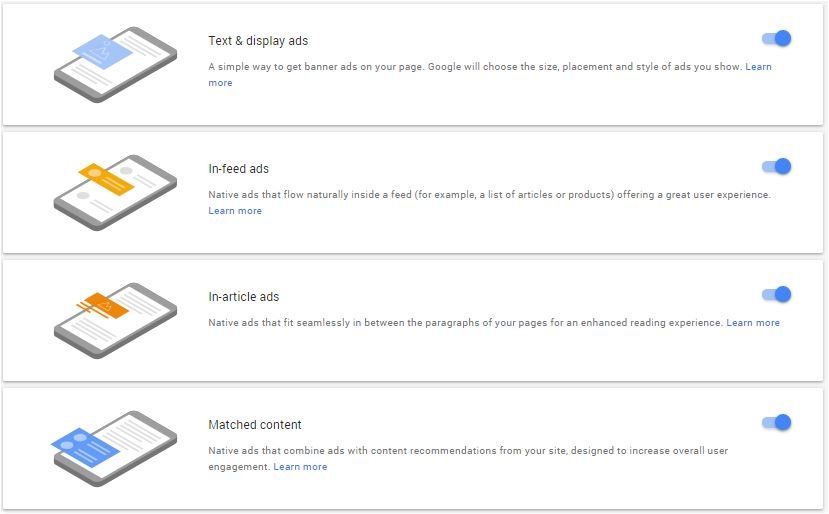
Just click the ‘Get Started’ buttons. As you enter in, you will see AdSense auto ads global settings. You need to select ad types that you prefer more. But I suggest you keep enabling all ad types.

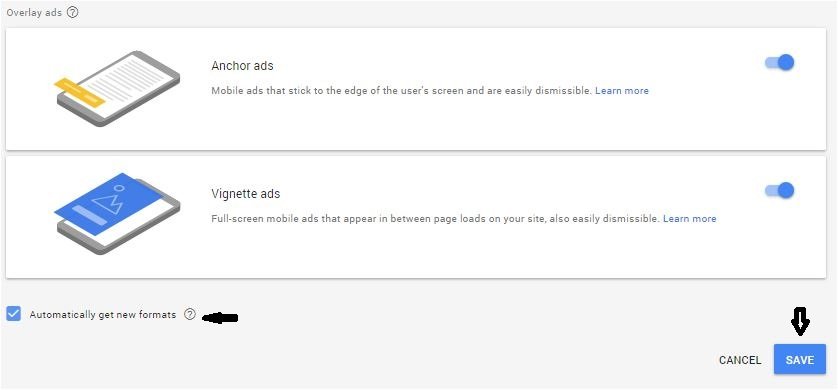
Additionally, AdSense allows you to enable or disable the ‘Page-level ads’ without leaving the current page.

I recommend you to enable all ad types because AdSense has now become more intelligent than you and can decide which ad type & ad placement fit better on your site.
So, don’t make your choices, let’s allow AdSense to make decisions for you.
After enabling all ad formats including overlay ads (Page-level ads), make sure you tick the option ‘automatically get the new formats’ shown under the overlay ads section.
As you click the save button and save all settings, you’ll be redirected to the ad code page. It is the code that you need to copy and paste within the theme head tag where you want to show the advertising.
4th STEP: –
Here you’ve two choices. You can either use a plugin or manually place the ad code everywhere you want to show the ads.
But again, it takes time if you do it manually. So, I’m switching to the first and quick method which is by using the plugin.
For that, you need to download the ‘Advanced Ads’ WordPress plugin. It is one of the best plugins I’ve ever come across.
5th STEP: –
After downloading, you will see an option of AdSense. You need to choose it and then click the Next button.
On the next page, you’re asked for AdSense publisher ID to connect your AdSense account with the plugin.
Lastly, select the option ‘Verification code & Auto ads’ and save changes. However, there are many other options, but you don’t need to make any changes.
You’ve successfully set the AdSense auto ads on your WordPress site. Ads will go live within 15 to 20 minutes
FAQs for Google AdSense auto ads.
#1. Should I remove the AdSense ad code already available on my site before setting up auto ads?
Answer: No, you don’t need to do anything.
#2. What about Page-level ads? Should I have to replace the page-level ad code from my site?
Answer: Nothing, You don’t need to replace page-level ad code from your site. AdSense auto ads will automatically detect the available code and replace it with the new auto ad code.
#3. What are the benefits of auto ads?
- Machine learning technology helps publishers to serve ads that are already optimized for the best.
- Increase your revenue.
- Increase the ad viewability that inevitability improves the validity of the ad impression.
- One can easily implement auto ads without tweaking ad placement and ad types because AdSense has now taken responsibility from you.
- It also enhances the user experience which is a significant measure of rankings.
A few popular related guides you might want to check out…
- Why my AdSense ads are not showing on my blog or website
- How to Convert hosted account into non-hosted account to enable the ads on site


