
![Migrate WordPress Site To New Domain Without Losing SEO [Ultimate Guide]](https://beginnersblog.org/wp-content/uploads/2018/07/Migrate-WordPress-Site-To-New-Domain-Without-Losing-SEO-Ultimate-Guide.png)
Would you like to migrate the WordPress site to the new domain? If yes then don’t go anywhere. It’s a step-by-step process that will take care of all aspects of migration including saving SEO rankings.
Let me tell you a story of mine that encouraged me to redirect my site data from the old domain to the new domain.
Back in September 2015, I launched my website with the domain ‘Mechaplanet’. I chose Mechaplanet because at that time I was likely to write about robots or mechatronics.
After some days, I dropped my idea and switched to blogging and SEO kind of stuff. But I didn’t change the domain name.
My site was running on the old domain with the new idea of SEO & blogging tips which was irrelevant.
Whenever I searched for my site on Google, I found irrelevant results, and it made me worry. It was terrible. Therefore, I decided to redirect my site from the old domain to the new domain.
So sit tight and follow the entire process thoroughly. It’s too many headaches, and you might be confused that’s why I’ve broken down the whole PROCESS into simple steps.
All you need to do is walk through this checklist and implement every step mentioned in this guide. I guarantee you if you follow all instructions given below, you’ll successfully move your WordPress site to a new domain without losing SEO and Google rankings.
Let’s get started…
Before you move further, I want you to give a quick overview of what it contains
Let’s talk about each of these sections one by one.
Essential things you need to know before you migrate to a new domain [prerequisite]
Hosting company: This guide is valid for all hosting servers, provided you’re granted to log in to c-Panel. I’m assuming that you know the basics of c-Panel. You don’t need to be on Hostgator. But make sure you know how to use cPanel if you don’t then make sure you consult your hosting provider.
Delete unnecessary stuff: If your site contains additional pages, posts and plugins then delete them before transferring the WordPress site to a new domain.
Update: It is better you update your WordPress before you start execution. However, it’s not that important, but it is to make sure that everything goes smoothly.
Clear the cache directory: If you’ve installed the cache plugin then delete the cache directory before you started. It could help you increase the server space and make the process easy. I removed my cache file that released 30 MB from my server.
New domain name: Before you move further, make sure you’ve purchased a domain name and connected that domain to the server using nameservers.
Check server space: You’re going to duplicate your site’s database which requires additional space so make sure your hosting server has enough space to handle the duplicate data. Let’s say your database is 100MB then your server has a minimum of 100MB of additional free space to store the files.
Second domain in your server respiratory: If you have another site in your server’s root directory then make sure you exclude database files of that domain from your archive file while duplicating the first site. (If you’re confused then don’t worry, keep on reading)
Server uploading capacity: Check the uploading capacity of your server and compare it with the size of your database. If server capacity is lower than a database, then you need to upload files using FTP.
Migrate WordPress Site To New Domain Without Losing SEO [Ultimate Guide]
1. Take Backup (For safety purposes)
You don’t want to risk your business blog, so it’s a great idea to take a backup of your site before you move on.
As a WordPress user, you’re lucky to take backup using plugins. However, you can also do it from your c-Panel.
But I recommend you to use the plugin. You can either use free or paid plugins. If your site has large data, then you can go for the premium plugin.
By the way, my site is not so big, but it still has 450MB of data. I’ve used the free version of ‘The updraft plus plugin. It took me 5 minutes to take a backup on my computer.
To take the backup first Go to WordPress dashboard > plugins > add new and install the ‘Updraftplus’ plugin.
Once you’ve installed it, you’ll find it on the upper header of the WP dashboard.
![]()
As you click the ‘current status/ backup now’ option, you will be redirected to the main page where you can set up your backup. As you click the ‘Backup Now’ button, you are all set. The plugin will start preparing for backup.

It would take a couple of mintues depending on the size of your site.
After that, head to ‘existing backups’ and download the backup files separately. It generates five different – 2 files (Database, themes, plugins, uploads, and others).

Click on files and then ‘download to your computer. You’ve successfully taken the backup of your site on your computer.
The purpose of backup is to recover your data in case something goes wrong.
Now, you’re ready to move to the next step.
2. Install Duplicator- WordPress migration plugin
First of all, install the ‘duplicator plugin.’

Upon activation, you will see an option ‘duplicator’ in the left sidebar of the WP dashboard.

Next, click the ‘create new’ button.
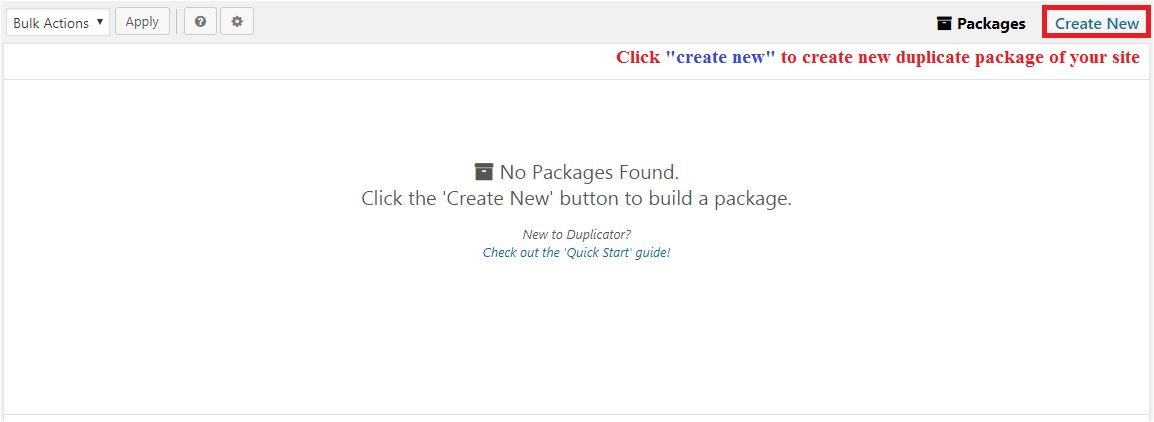
After a few seconds, the plugin will start scanning your site.

Once the scanning is completed, it will show you the scan results. You need to take a look at all factors. Don’t worry if you get some notices. But make sure you get green signals for ‘setup’ and database ‘overview’.

If your scanning results are right, then go down and click the build package button.
Now wait for a moment and see whether or not the plugin can build a package for your site.
If it’s successful, you’ll see build status where you’re required to download two files to your computer. The first one is ‘Installer.php’ and the second one is ‘Archive’. Make sure you remember the download location because you need both files a few minutes later.

PRO tip: – What do you do if the plugin is unable to build the package
Sometimes Duplicator plugin shows you an error and unable to create the package. If you get an error, then don’t worry here is a tip for you.
Another version of the duplicator plugin is available. You need to follow the link given below.
http://snapcreek.com/duplicator/duplicator-lite-1-3-beta/ from here you need to download it and upload it to the server.
After uploading, install and activate the plugin and try to build the package again.
3. Creating a database and other stuff
Once you’ve successfully downloaded ‘installer.php’ and ‘Archive’ files to your computer, you need to create a new database on your server.
Instructions to follow: –
Log in to your hosting c-panel. You may find login credentials in your welcome email from hosting. If you’re unable to find it, then contact your hosting provider.
Once you’re in, go and click on ‘The MYSQL database option.

Type in the name of the new database and click on the ‘create database’ button.

After clicking the ‘create database’ button, you’ll see the confirmation message to let you know that the database was created

- Now as you scroll down, you’ll see an option to create MYSQL new user. Here you need to put a username and strong password.
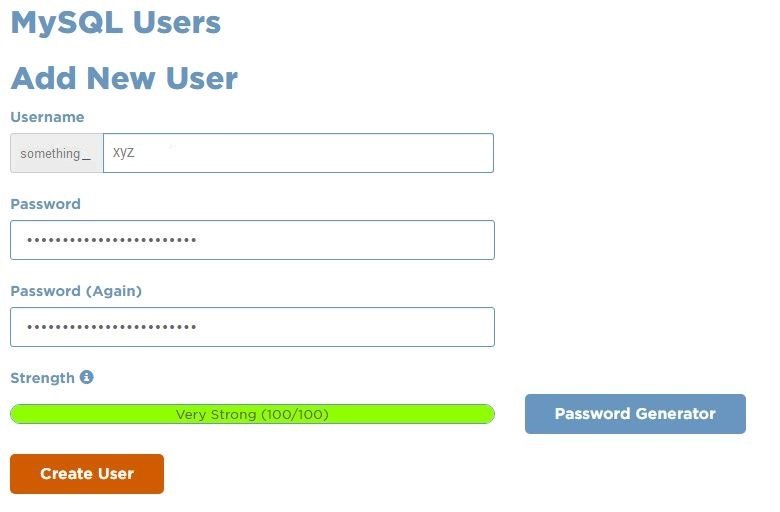
Next, you see an option to add a user (that you’ve created previously) to the database. Here you have to select the database and user that you have created already and click on the ‘Add’ button.

Then give all privileges to your database.

Keep all database credentials remember. I mean your full database name, username, and password because you’re required them when you run the installer.php.
4. Point New Domain To Your Existing Hosting Server
Now, your database is ready, and you can upload files to your database that you’ve downloaded previously on your computer. (Installer.php and archive)
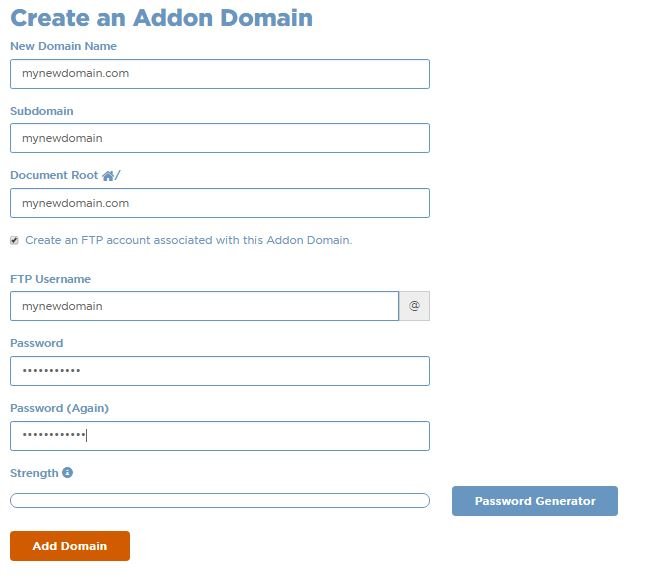
For that, first, you need to add your new domain to your hosting and point it using a nameserver.
Initially, Go to cPanel > Addons domain. Put your domain name and don’t forget to tick “create an FTP account associated with this Addon Domain” given below.
Finally, head to c-Panel and click the file manager option.
Find the root folder of your new domain. And upload both installer.php and archive files.
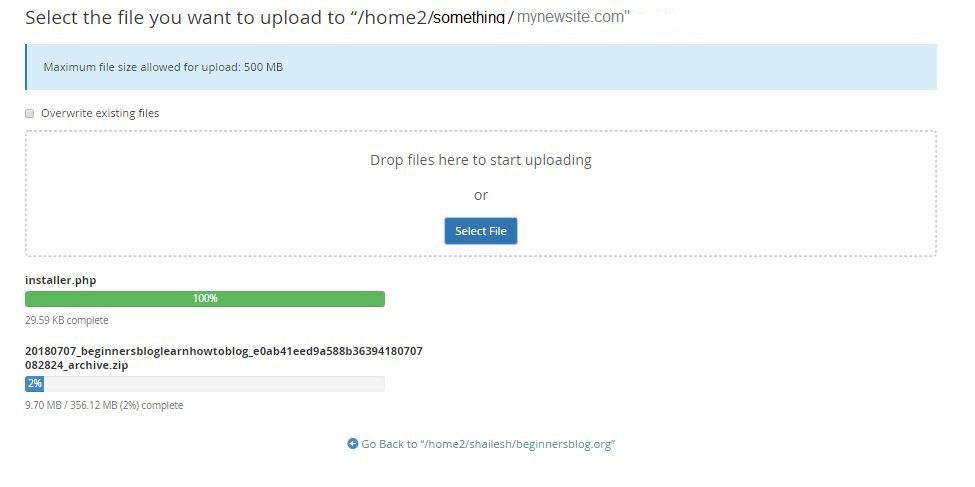
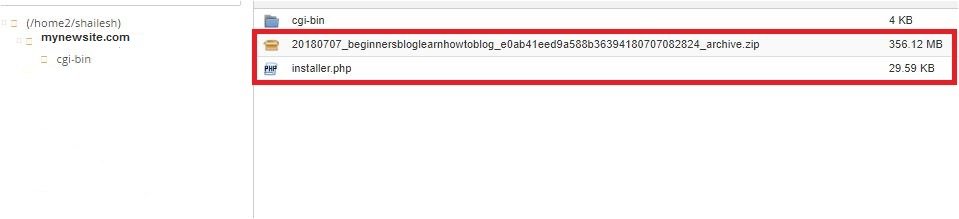
Now, it’s time to move on to the next step which is ‘Run installter.php.’
5. Run installer.php
Go to the browser and type in ‘mynewsite.com/installer.php.’

As you hit enter, you’ll see an installer page. It is a term and condition page. You need to tick and press the next button.
The archive file extracting process is taken in the next step.

Once it is done, you’re taken to the next level. Here the main thing happens. You need to give the following information.
- Action: You need to choose the ‘connect and remove all data’ option (Choose this option only if you’ve created new data. If you don’t, then go up and see how to create a database and create one.)
- Hostname: You can find it in the c-panel in the form of server name or server IP
- Database name: Put the MYSQL database name that you have created previously.
- Username: Enter the MYSQL database-user-name that you saved while creating the MYSQL database.
- Password: MYSQL database user password

Once you enter all information correctly, click the test database button and see whether or not everything is okay.
If it’s okay, then click next. A popup will appear that confirms that the database installation was successful.
In the next step, you have to update your site data. You need to enter your new domain name, path, and site title. However, everything comes up-to-date. But you need to recheck them to make sure everything is correct.

6. log in to the WordPress dashboard and Test
As you hit the next button, you’ll see a site-login button.
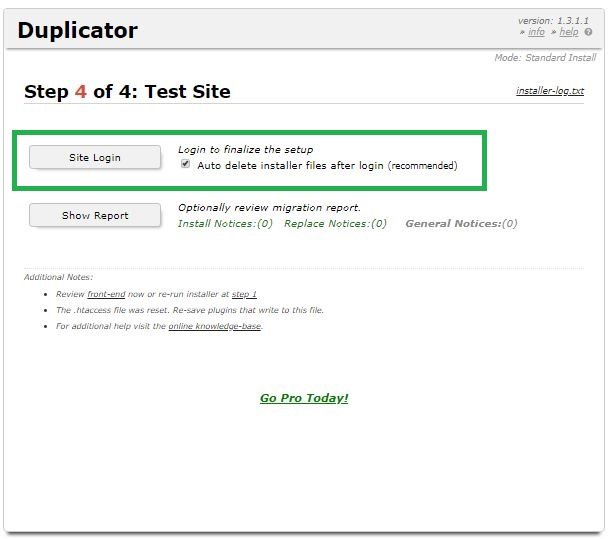
As you click on the site login button, you’ll be redirected to the WP login page. Put old WordPress credentials (username and password)

The last thing you need to do is go to settings > general > permalinks and then click the save changes button.
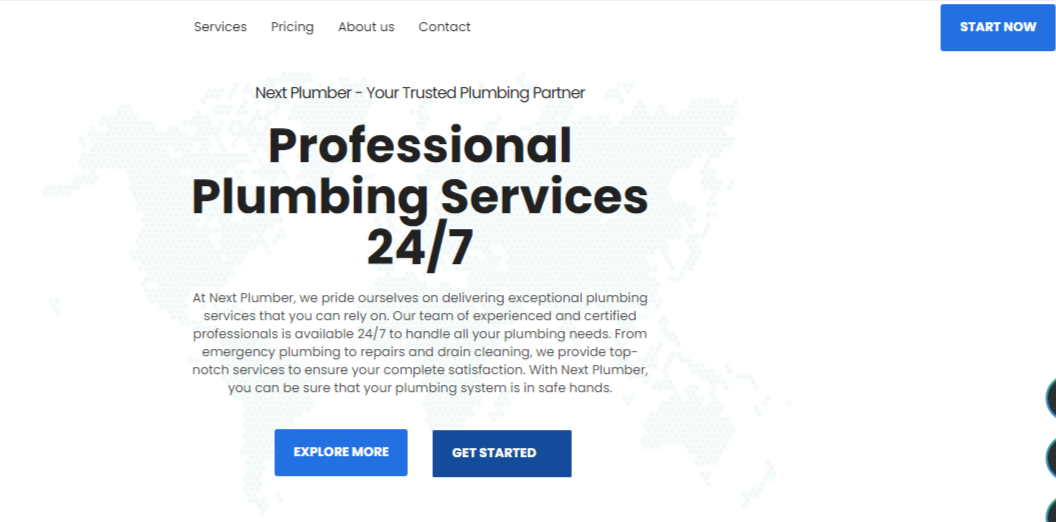
Now test your site to ensure that everything is getting smoother.
You’ve completed the process to move the WordPress site to a new domain.
The primary site migration process has been completed, but as I promised that you wouldn’t lose your SEO and ranking so continue reading…
Let’s come to the part of SEO…
7. Initialize 301 redirection
As the Google ranking is a concern, it’s essential to make 301 redirections because Google’s Gary illyes tweeted, ‘’ 30x redirects don’t lose page rank anymore. 26 July 2016. “

That’s why you should make 301 redirects from your old domain to the new domain. Let’s initialize the process without further due.
It’s a two-step process…
First step –
Go to c-Panel > file manager. Now, head to the root directory of the old domain and allow the hidden files to show. (You can only see the .htaccess file after enabling hidden files to show)
Second step –
Find .htaccess file. Download the copy of it to your computer to recover in case of failure.
Edit the .htaccess file and paste the below code on the top of the file.
#Options +FollowSymLinks
RewriteEngine on
RewriteRule ^(.*)$ http://www.mynewdomain.com/$1 [R=301,L]
Note: Don’t forget to replace http://www.mynewdomain.com with your original new domain.
It’s all done. Now go and type your old URL and check whether or not it is redirecting to the new URL.
301 redirects take care of all link juice and pass it to your new domain.
8. Tell Google about redirections
Before you begin, you first need to add your new domain to the Google search console as a property. I hope you perhaps know how to add a domain to the Google search console.
However, it’s not harsh, open your old Google search console account and head to the home page where you can see all available properties.
Now, click on the ‘add a property’ button and put your domain. Verify your ownership and you are all set.
Next, go to the search console’s homepage and click the old domain that you want to 301 redirect to the new domain.

After that, click on the gear icon and select ‘Change of Address’.
In this section, you’ll find a little checklist that you need to follow.
Google asks you:
- Pick your new domain
- Confirm that 301 redirects are working properly
- Both old and new URLs are verified
- Confirm that you’re migrating your site from an old to a new domain by submitting the changes.
Have a look at this screenshot.

9. Add a new URL to Google analytics and verify your ownership
As you’ve redirected to a new domain, it’s essential to track the user’s activity and traffic. So go to your old analytics account and add the new domain and verify it by putting the tracking code within the <head></head> tag.
10. Update social media profile with new URL
However, you’ve successfully transferred the WordPress site to a new domain and informed Google.
But there is still one thing that you would be missing which is social media profile updates.
Make sure you replace the old domain with a new domain from all your social media profiles.
Aside from it, you also need to change the URLs from your forums and social bookmarking sites.
So, you’ve completed the entire process of moving WordPress to a new domain without losing SEO rankings.
Ideally, you won’t get issues. But I know when you set up your plan and follow the instructions to transfer the site from the old to the new domain you may get some issues OR you may have some questions to ask.
I got so many issues while going through the migration process but I don’t want you to face the same situation. That’s why I’ve included the most common FAQs that can help you solve your doubts.
11. Questions that you may ask while going through this process…
Question-1. Do I lose SEO and ranking after redirection?
Answer: I don’t KNOW the exact solution, but according to Google’s Gary illyes and John Mueller, 30x redirects don’t affect your page rank and rankings.
And so far I agree with it because I’m getting the same traffic after redirecting my site to the new domain.
Question-2. How much time does Google take to pass link juice to the new domain?
Answer: According to Google, it takes six months (180 days) to completely forget the old domain and pass all link juice to the new domain.
But I also found that it depends on how big your site is. The bigger your website; the more time Google will take to index the new URLs.
In fact, my site has only 130+ posts, and Google has already indexed 56 posts within four days.

but if your site has 1000+ posts, then Google will take more time than usual.
Question – 3. I was using CDN with my old domain, what should I do now after redirection?
Answer: You’re all set. If you are not getting any redirecting issues, then you don’t need to make any changes.
All you can do is go to the WordPress admin dashboard and head to the cache plugins that you are using and replace the ‘original URL’ with the new URL. This could give you an error. If you encounter the error then you can go and create a new pull zone in case you are using MXCDN.
And make sure you delete the old pull zone from the MAXCDN server.
Question – 4. The Duplicator plugin is unable to create a package. What should I do?
It happened to me when I was trying to create a package. I didn’t know, but when I click the Build package button, it failed.
But here is an alternative version of this plugin that you can use to get rid of this mess.
Question – 5. The duplicator plugin is showing me the red notice while scanning. Should I go further to build the package?
Answer: My site’s scan results were not that good. I also got notices like: –
- Site checks and read checks notice under the Archive section
- I got a WordPress notice under the server section
But, the plugin has successfully built the package without any issues.
Question 6: What about Google AdSense? Should I need to do something?
No, you don’t need to make any changes. As you’ve 301 redirected your site, Google will automatically make changes.
All you need to do is go to WordPress and see whether or not the plugin that you’re using for ads is working fine.
Additionally, Go and check your site to ensure that the ads are appearing on your site.
Learn More:
- What is Google AdSense and how does it work?
- How to set up AdSense auto ads in minutes to your site.
Question-7. Should I have to keep my old domain renew? OR how long does Google take to transfer the SEO juice to the new domain completely?
Yes, According to Google officials, it takes 180 days to forget the old domain completely. So, it’s good to keep feeding your old domain unless Google recognizes your new domain entirely.
However, Google’s John Mueller suggests you keep your old domain alive for more than one year to recover all SEO and rankings. If your site is so big and has tons of posts then only you need to keep it alive for one year.
Following things you need to with the old domain
- Renew for one year
- Renew hosting, if you’re not on shared hosting
Question-8. Should I submit a sitemap again that contains new URLs?
Yes, because it helps Google to crawl new URLs faster than usual. If you’re a WordPress user, then you don’t need to make a new sitemap because the Yoast SEO plugin automatically gets the reflection of a new URL. Just go to the search console and submit the sitemap for your new domain.
Question-9: I am using SiteLock security What should I do?
Security should be your prime concern, so make sure you migrate your security from an old to a new domain. You can follow the same process to submit your directory to SiteLock to make regular scans. [Refer to this guide: How to configure site lock with your site]
Conclusion
I’ve tried my best to create this comprehensive guide to help you move your WordPress site to a new domain without losing Google rankings.
Additionally, I’ve added every solution that helps you a lot. Migrating your site to a new domain is not as tough as you’re thinking.
But, It could add some extra bills to your billing lists. So, make sure before you move to another domain you’ve extra cash in your pocket to keep your old domain alive for at least one year.
I hope you’ve successfully moved your old site to the new domain.
Love this guide? Then make sure you don’t forget to share it with others on social media platforms.
Do you have any issues while following the instruction given in this guide? Feel free to ask.
If you appreciate my work, then go and follow me on social media. (Facebook page)


3 thoughts on “Migrate WordPress Site To New Domain Without Losing SEO [Ultimate Guide]”
backup is necessary..
thanks for this useful post..
Thanks for your appreciation…
Hello Dear,
This is a very Unique Article.I have only one word Awesome.
Thank you so much.