Welcome back to the “Quick Solution” category of beginners blog.
In this section, you’ll get the exact answer to your questions regarding Blogging, WordPress and SEO tips.
And today’s question is “How to add anchor links in WordPress”.
Let’s move on…
What are WordPress anchor links?
Sometimes referred to as “Jump Links” or “Page Jump”
These are in-page links that you can use to jump on existing subheadings on a page or post”.
For example,
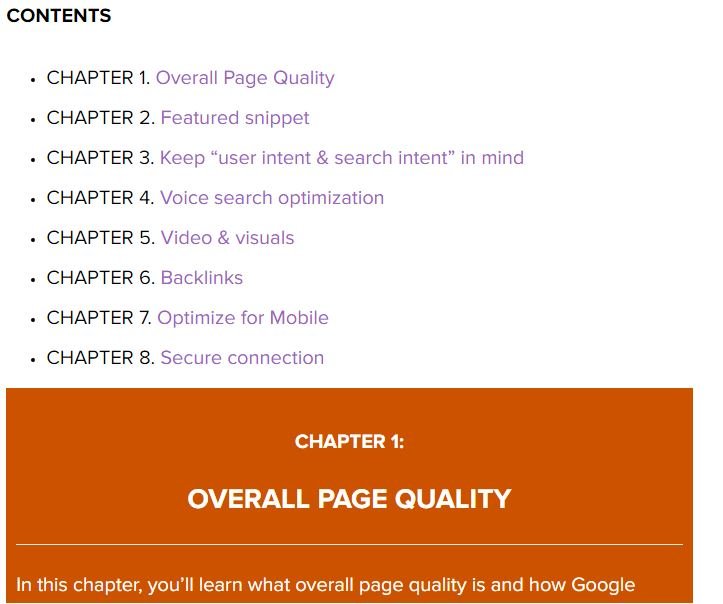
Recently, I’ve published a detailed guide about SEO 2020.
As it’s an in-depth guide, so I broke it down into 8 sections.
LIKE THIS:

It helps readers to navigate different-2 chapters without scrolling manually.
Now, I’m sure you know what Anchor links in WordPress are.
Let’s see how you can add anchor links within your post quickly.
There are two simple ways: –
- Using manual code
- Using WordPress plugins
USING MANUAL CODE
It’s really simple.
Just follow these steps:
1. Login to Your WordPress dashboard.
2. Next, open WordPress post editor.

3. Now, add sections to your post.
Let’s say,
- EXAMPLE1 (section)
- EXAMPLE2 (section)
- EXAMPLE3 (section)
Now go to the next step
4. In this step, assign IDs to subheadings using WordPress hyperlink feature.
You can keep the ID name same as the subheading.
LIKE THIS:
- For “Example1” – ID is #example1 (you can even choose different ID name as per you convenient)
- For “Example2” – ID is #example2
- For “Example3” – ID is #example3
Now add these IDs respectively.
Something like this:
Example1 (I’ve linked subheadings with assigned ID)
Similarly, Example2 and Example3
5. In the fifth step, you need to add IDs to the section’s tag (h1, h2, h3)
SEE how do you do it?
Simply, switch to ‘visual’ to ‘text’ editor using the toggle button given in the top right corner of your WordPress post editor.

Once you are in, look for sections.
You can even use ctrl + F to find sections.
Here your sections are: EXAMPLE1, EXAMPLE2 and EXAMPLE3
This is the format of the one of your sections in text editor: –
Something like this:
<h2 style= “color: #000; font-size: 18px;”>EXAMPLE1<h2>
Now you need to add the IDs to respective heading tags.
LIKE THIS:
For section “EXAMPLE1”
<h2 id =”example1” style = “color: #000; font-size: 18px;”> EXAMPLE1<h2>
For Section “EXAMPLE2”
<h2 id =”example2” style = “color: #000; font-size: 18px;”> EXAMPLE2<h2>
For Section “EXAMPLE3”
<h2 id =”example3” style = “color: #000; font-size: 18px;”> EXAMPLE3<h2>
Congratulations! You have successfully added anchor links to your WordPress post.
Now, let’s test it…
For this, Scroll up and hover over 3rd step and click any anchor link provided.
As you click, you will jump to the respective section.
EXAMPLE1
Dummy content…
Dummy content…
Dummy content…
EXAMPLE2
Dummy Content…
Dummy content…
Dummy content…
EXAMPLE3
Dummy Content…
Dummy content…
Dummy content…
That’s it…
The benefit of using this method:
PROS:
- No plugins are needed. It means there are no additional requests.
- It doesn’t affect your site loading speed
- Better user experience
- Easy to navigate
CONS:
- If someone jumps to a section and don’t understand what you wrote then he may leave your blog.
Okay, it’s all about adding an anchor link to your blog post manually.
USING WORDPRESS PLUGIN
Now let’s see a few plugins that you can use to do the same…
1. TABLE TO CONTENT PLUS
It’s really simple to use.
All you have to do is install this plugin and use it.
And for that, just add this tag around the text you want to make anchor link.
However, it is for “Table of Contents” but you can still use it as a normal anchor link.
#2. EASY SMOOTH SCROLL LINKS – SMOOTH SCROLLING ANCHOR
Unlike jump link, this plugin adds scroll animation to anchor text.
You can use the shortcode: [anchor] ANCHOR TEXT [/anchor]
Either you use plugins or manual method, you can enable scroll or jump feature that helps readers or users to navigate easily.
Do you love this guide? Share it with others…
If you have any query then feel free to ask in the comment section.


