It’s a quick solution series where you will find a quick answer to any question.
And today’s question is about ‘How to disable directory browsing.’
I’ll try to give you the proper solution about how to disallow Google to crawl ‘index of /’ types of pages and deindex completely.
Let’s get started…
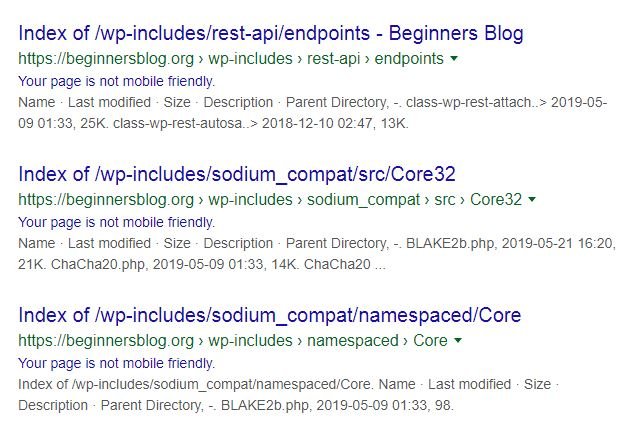
Back in days, when I checked out site indexing using site:beginnersblog.org I noticed 50 -70 ‘WP-includes’ types of pages.

Initially, I didn’t know anything about directory browsing. So I started to look for the solution.
I read serval forums talking about a similar problem and apply some of these solutions, but nothing happens.
However, some solutions could be the correct choice for you but didn’t work for me.
Fortunately, after hours of work, I got the solution about how to no-index directory browsing from Google.
There are 4 possible methods for disabling directory listing…
- Using cPanel
- Using .htaccess file
- Using Robots.txt file
- Creating a blank index.html page
How To Disable Directory Browsing In WordPress
Let’s discuss each of this one by one…
#1. USING C-PANEL
This is the one that works for me… And of-course will work for you if you have access to cPanel.
The good thing about this method is that you don’t need to tweak with coding.
And there is no risk of failure.
NOTE: – I’m using HOSTGATOR hosting and there are an option ‘indexes’ inside cPanel under advanced section. If you’re not using HostGator then make sure you still have the similar option of indexing.
Let’s dive into it…
STEP – 1
Login to cPanel.

STEP – 2
Once you are in, go ahead and look for the ‘Indexes’ option.

STEP – 3
This is the final part of the process.
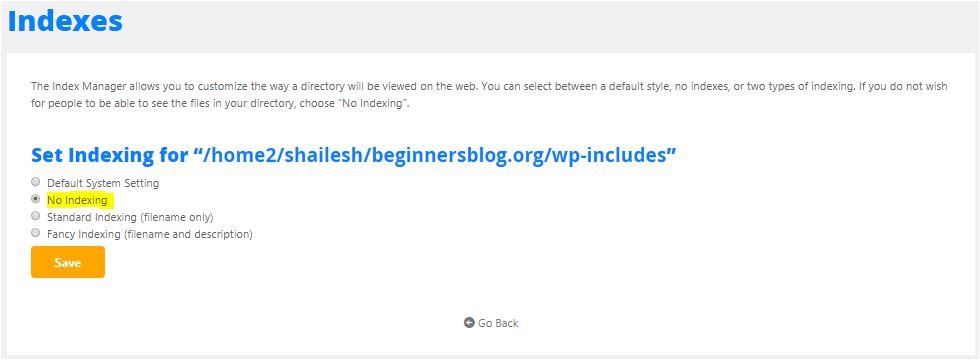
As you click the ‘indexes’ option, you will see a list of directory.

You need to choose one that you want to disable from Google indexing.
For example, if you want to de-index ‘WP-includes’ then just click over it.
After that, it asks you to select the preferred option.

Here you want to no-index your directory from Google, so choose ‘no – indexing’ option and save changes.
That’s it…
Lastly, go to the browser and check for the directory location using this URL (http://yourdomain.com/wp-includes / ) to know whether or not browser still fetches your directory.
If you see this error “It appears you don’t have permission to access this page! 403 forbidden.
You’ve successfully disabled directory browsing for your blog.
#2. USING .HTACCESS FILE
Aside from the above, this method is a little tricky.
Because you need to tweak with code.
However, I will provide you with a proper solution.
So don’t worry just shit tight…
Before moving further, let me tell you where you can find a .htaccess file.
.htaccess file plays a vital role and assigns certain rules to your server.
You can add additional rules to stop Google indexing your directory.
There are different-2 rules you can add to .htaccess file and check whether or not it is working.
This file is located in your root folder. It’s a hidden file that you can’t find on the server.
To enable it, check the ‘show hidden files’ under the settings icon.
Add ‘Options -Indexes’
Another easy method to stop apache directory indexing is here.
All you need to do is add this simple line of code to your .htaccess file.
Options -Indexes
But before you edit .htaccess file, make sure you download a copy of .htaccess file to your computer for recovery. (In case something goes wrong)
NOTE: – It will only work if you have ‘AllowOverrides’ enabled on your server. Several articles can help you with this.
#3. USING ROBOTS.TXT FILE
Robots.txt file instructs web robots on how to crawl a web page. Here you can specify what to allow and disallow from your server.
You can also use it to disallow web crawler to crawl directory browsing.
However, it doesn’t work for me but you can try it.
You need to edit and add the following rules to robots.txt file. (In case you don’t have robots.txt file then create one in the root folder).
There are two ways to edit robots.txt file.
- Yost SEO plugin – Go to TOOLS > file editor > robots.txt
- cPanel – Go to root folder > look for robots.txt file
Once you are in, add the following rules…
Disallow: /wp-includes/
Noindex: */wp-includes/*
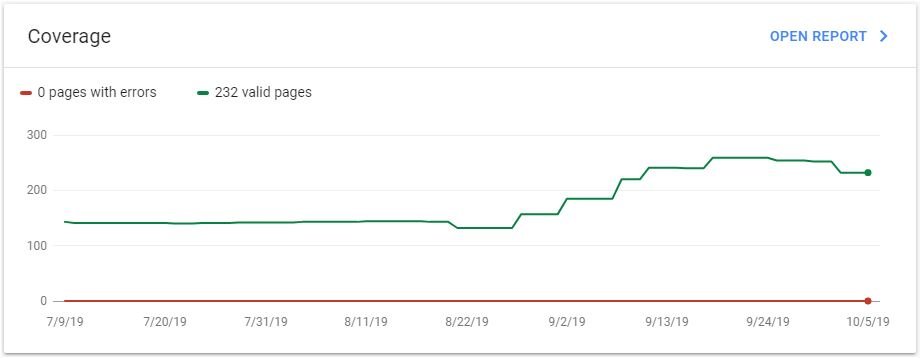
Now check crawl stats in search console. If you see the decline Coverage curve within 2-3 days, it means Google has started de-indexing your directory.

#4. CREATE A BLANK INDEX.HTML PAGE
Basically, this problem arises because of the ‘mod_autoindex’ feature available in Apache as It creates an index.html file automatically.
In case if there is no index.html in the directory, it creates one and list all directory’s folder in it.
Web crawlers think that it’s a web page and index it.
To stop directory listing, you can create a blank index.html file in the directory folder.
Google doesn’t index blank pages as these are considered as “404 soft pages”
That’s it…
CONCLUSION
Here I have given you 4 solutions to disable directory browsing. You can try one of these methods to solve this problem.
In my opinion, the first method is the best method that always works. However, the second method will also work well, if AllowOverride is enabled.
But if you don’t want to tweak with codes then you’re welcome to apply the first method.
3rd method is easy but sometimes it doesn’t work.
4th method is also an easy one but doesn’t work in many cases.
Now it’s your turn…
Which method you’ll try. Let me know in the comment section.


![How To Disable Directory Browsing In WordPress [Four Solutions]](https://beginnersblog.org/wp-content/uploads/2019/10/How-To-Disable-Directory-Browsing-In-WordPress-Four-Solutions.png)


2 thoughts on “How To Disable Directory Browsing In WordPress [Four Solutions]”
Now I know how to disable browsing WordPress after reading this article. thank you for sharing
Good to know that you learned something… keep learning!